Haunted Vanilla Ice Cream Sandwiches: Halloween Treats
Share
HAUNTED VANILLA ICE CREAM SANDWICHES
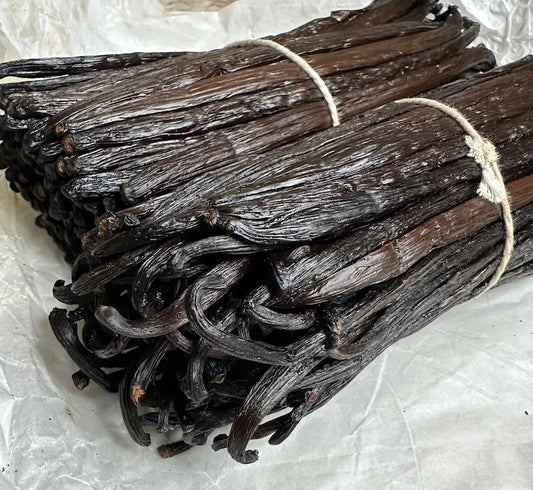
Kick your Halloween party up a notch with these delicious Halloween Ice Cream Sandwiches made with our premium Ugandan vanilla bean! Known for its rich, creamy, and aromatic profile, vanilla beans take this ice cream sandwiches to a new level of indulgence. These treats are festive and versatile, customizable to meet dietary needs, whether gluten-free or vegan. With our premium-quality vanilla beans, now available for purchase, start making spooky and sweet memories today!
Halloween Ice Cream Sandwiches Ingredients
Basic Ingredients
- 1 cup unsalted butter
- 1 1/2 cups granulated sugar
- 2 large eggs
- 1 Ugandan Vanilla Bean, (available to purchase) split and seeds scraped – Our vanilla bean brings exceptional depth and a bold aroma to these Halloween treats.
- 3 1/2 cups all-purpose flour (or substitute with a gluten-free flour blend)
- 2 teaspoons cream of tartar
- 1 1/2 teaspoons baking soda
- 1/4 teaspoon salt
- Your favorite variety of vanilla or dairy-free ice cream – Use coconut-based or almond milk ice cream for a vegan option.
- Halloween sprinkles, mini candy eyes, melted chocolate for toppings
How to Make Your Halloween Ice Cream Sandwiches
1. The Vanilla Bean Cookies
- Preheat the Oven: Set to 350°F/175°C and line a baking sheet with parchment paper.
- Mix Butter and Sugar: In a large mixing bowl, cream together softened butter and granulated sugar until smooth and fluffy.
- Add Eggs and Vanilla: Add eggs, one at a time, beating well. Then, add the vanilla bean seeds for a rich vanilla essence.
- Combine Dry Ingredients: In another bowl, whisk together flour, cream of tartar, baking soda, and salt. Gradually mix into the wet ingredients until just combined.
- Shape the Cookies: Roll about 2 tablespoons of dough into balls. Roll each ball in either Halloween sprinkles or cinnamon sugar. Place on a baking sheet and flatten slightly.
- Bake: Bake for 10-12 minutes until edges are golden. Cool completely on a wire rack before assembling.
2. Prepping the Ice Cream for Assembly
- Soften the Ice Cream: Remove ice cream from the freezer for 5-10 minutes to soften for easy scooping.
- Flavor Options: Vanilla or chocolate ice cream complements the bold notes of vanilla bean in the cookies.
3. Assembling the Ice Cream Sandwiches
- Add the Ice Cream: Scoop about 1/3 cup of ice cream onto the flat side of a cooled cookie. Place another cookie on top, pressing gently to spread the ice cream to the edges.
- Decorate for Halloween: Roll the edges in Halloween sprinkles, add candy eyes, or drizzle with melted chocolate for spooky detail.
- Freeze to Set: Place assembled sandwiches in the freezer for at least 1 hour to firm up.
Tips for the Best Halloween Ice Cream Sandwiches
- Freeze Cookies Before Assembling: Prevent melting during assembly by freezing cookies in advance for 20-30 minutes.
- Use Parchment Paper: Assemble on parchment paper for clean surfaces and easy handling.
- Storage: For longer storage, wrap sandwiches individually in wax paper, place in an airtight container, and freeze for up to one week.
How to Store and Serve Your Halloween Ice Cream Sandwiches
Store ice cream sandwiches in a freezer-safe container. For best results, let sandwiches sit at room temperature for a few minutes before serving to soften the cookies slightly. These Halloween treats are perfect for parties and add fun and deliciousness to any occasion!
Try NY Vanilla's Premium Ugandan Vanilla Beans for Unforgettable Flavor
Take your Halloween ice cream sandwiches to the next level with the rich, velvety taste of our Organic vanilla beans. Order now and treat your taste buds to a new class of flavor that will make your Halloween treats unforgettable.
Get yours today before they’re gone!

